Subscribe to the newsletter for all the latest crafts + access to the creative library!
[data-ff-el="root"].ff-623350297e7ec064e82a1d10 *,
[data-ff-el="root"].ff-623350297e7ec064e82a1d10 *::before,
[data-ff-el="root"].ff-623350297e7ec064e82a1d10 *::after {
box-sizing: border-box;
}
[data-ff-el="root"].ff-623350297e7ec064e82a1d10 [tabindex="-1"]:focus {
outline: none !important;
}
[data-ff-el="root"].ff-623350297e7ec064e82a1d10 h1,
[data-ff-el="root"].ff-623350297e7ec064e82a1d10 h2,
[data-ff-el="root"].ff-623350297e7ec064e82a1d10 h3,
[data-ff-el="root"].ff-623350297e7ec064e82a1d10 h4,
[data-ff-el="root"].ff-623350297e7ec064e82a1d10 h5,
[data-ff-el="root"].ff-623350297e7ec064e82a1d10 h6 {
margin-top: 0;
margin-bottom: 0.7em;
}
[data-ff-el="root"].ff-623350297e7ec064e82a1d10 p {
margin-top: 0;
margin-bottom: 1rem;
}
[data-ff-el="root"].ff-623350297e7ec064e82a1d10 ol,
[data-ff-el="root"].ff-623350297e7ec064e82a1d10 ul,
[data-ff-el="root"].ff-623350297e7ec064e82a1d10 dl {
margin-top: 0;
margin-bottom: 1.4rem;
}
[data-ff-el="root"].ff-623350297e7ec064e82a1d10 ol ol,
[data-ff-el="root"].ff-623350297e7ec064e82a1d10 ul ul,
[data-ff-el="root"].ff-623350297e7ec064e82a1d10 ol ul,
[data-ff-el="root"].ff-623350297e7ec064e82a1d10 ul ol {
margin-bottom: 0;
}
[data-ff-el="root"].ff-623350297e7ec064e82a1d10 b,
[data-ff-el="root"].ff-623350297e7ec064e82a1d10 strong {
font-weight: bolder;
}
[data-ff-el="root"].ff-623350297e7ec064e82a1d10 small {
font-size: 80%;
}
[data-ff-el="root"].ff-623350297e7ec064e82a1d10 sub,
[data-ff-el="root"].ff-623350297e7ec064e82a1d10 sup {
position: relative;
font-size: 75%;
line-height: 0;
vertical-align: baseline;
}
[data-ff-el="root"].ff-623350297e7ec064e82a1d10 sub {
bottom: -0.25em;
}
[data-ff-el="root"].ff-623350297e7ec064e82a1d10 sup {
top: -0.5em;
}
[data-ff-el="root"].ff-623350297e7ec064e82a1d10 {
color: #000000;
text-decoration: none;
background-color: transparent;
-webkit-text-decoration-skip: objects;
}
[data-ff-el="root"].ff-623350297e7ec064e82a1d10 a:hover {
color: #4396fd;
text-decoration: none;
}
[data-ff-el="root"].ff-623350297e7ec064e82a1d10 img {
border-style: none;
vertical-align: middle;
}
[data-ff-el="root"].ff-623350297e7ec064e82a1d10 svg:not(:root) {
overflow: hidden;
}
[data-ff-el="root"].ff-623350297e7ec064e82a1d10,
[data-ff-el="root"].ff-623350297e7ec064e82a1d10 area,
[data-ff-el="root"].ff-623350297e7ec064e82a1d10 button,
[data-ff-el="root"].ff-623350297e7ec064e82a1d10 [role="button"],
[data-ff-el="root"].ff-623350297e7ec064e82a1d10 input,
[data-ff-el="root"].ff-623350297e7ec064e82a1d10 label,
[data-ff-el="root"].ff-623350297e7ec064e82a1d10 select,
[data-ff-el="root"].ff-623350297e7ec064e82a1d10 summary,
[data-ff-el="root"].ff-623350297e7ec064e82a1d10 textarea {
touch-action: manipulation;
}
[data-ff-el="root"].ff-623350297e7ec064e82a1d10 label {
display: inline-block;
font-weight: bolder;
margin-bottom: 0.7rem;
}
[data-ff-el="root"].ff-623350297e7ec064e82a1d10 button:focus {
outline: 1px dotted;
}
[data-ff-el="root"].ff-623350297e7ec064e82a1d10 input,
[data-ff-el="root"].ff-623350297e7ec064e82a1d10 button,
[data-ff-el="root"].ff-623350297e7ec064e82a1d10 select,
[data-ff-el="root"].ff-623350297e7ec064e82a1d10 optgroup,
[data-ff-el="root"].ff-623350297e7ec064e82a1d10 textarea {
margin: 0;
font-size: inherit;
font-family: inherit;
line-height: inherit;
}
[data-ff-el="root"].ff-623350297e7ec064e82a1d10 button,
[data-ff-el="root"].ff-623350297e7ec064e82a1d10 input {
overflow: visible;
}
[data-ff-el="root"].ff-623350297e7ec064e82a1d10 button,
[data-ff-el="root"].ff-623350297e7ec064e82a1d10 select {
text-transform: none;
}
[data-ff-el="root"].ff-623350297e7ec064e82a1d10 button,
html[data-ff-el="root"].ff-623350297e7ec064e82a1d10 [type="button"],
[data-ff-el="root"].ff-623350297e7ec064e82a1d10 [type="reset"],
[data-ff-el="root"].ff-623350297e7ec064e82a1d10 [type="submit"] {
-webkit-appearance: button;
}
[data-ff-el="root"].ff-623350297e7ec064e82a1d10 button::-moz-focus-inner,
[data-ff-el="root"].ff-623350297e7ec064e82a1d10 [type="button"]::-moz-focus-inner,
[data-ff-el="root"].ff-623350297e7ec064e82a1d10 [type="reset"]::-moz-focus-inner,
[data-ff-el="root"].ff-623350297e7ec064e82a1d10 [type="submit"]::-moz-focus-inner {
padding: 0;
border-style: none;
}
[data-ff-el="root"].ff-623350297e7ec064e82a1d10 input[type="radio"],
[data-ff-el="root"].ff-623350297e7ec064e82a1d10 input[type="checkbox"] {
padding: 0;
box-sizing: border-box;
}
[data-ff-el="root"].ff-623350297e7ec064e82a1d10 input[type="date"],
[data-ff-el="root"].ff-623350297e7ec064e82a1d10 input[type="time"],
[data-ff-el="root"].ff-623350297e7ec064e82a1d10 input[type="datetime-local"],
[data-ff-el="root"].ff-623350297e7ec064e82a1d10 input[type="month"] {
-webkit-appearance: listbox;
}
[data-ff-el="root"].ff-623350297e7ec064e82a1d10 textarea {
resize: vertical;
overflow: auto;
}
[data-ff-el="root"].ff-623350297e7ec064e82a1d10 [type="number"]::-webkit-inner-spin-button,
[data-ff-el="root"].ff-623350297e7ec064e82a1d10 [type="number"]::-webkit-outer-spin-button {
height: auto;
}
[data-ff-el="root"].ff-623350297e7ec064e82a1d10 [type="search"] {
outline-offset: -2px;
-webkit-appearance: none;
}
[data-ff-el="root"].ff-623350297e7ec064e82a1d10 [type="search"]::-webkit-search-cancel-button,
[data-ff-el="root"].ff-623350297e7ec064e82a1d10 [type="search"]::-webkit-search-decoration {
-webkit-appearance: none;
}
[data-ff-el="root"].ff-623350297e7ec064e82a1d10 ::-webkit-file-upload-button {
font: inherit;
-webkit-appearance: button;
}
[data-ff-el="root"].ff-623350297e7ec064e82a1d10 [hidden] {
display: none !important;
}
[data-ff-el="root"].ff-623350297e7ec064e82a1d10 .fd-form-control {
width: 100%;
display: block;
outline: none;
position: relative;
-webkit-appearance: none;
}
[data-ff-el="root"].ff-623350297e7ec064e82a1d10 .fd-form-control:focus {
outline: none;
}
[data-ff-el="root"].ff-623350297e7ec064e82a1d10 .fd-form-control::-webkit-input-placeholder {
color: transparent !important;
opacity: 0 !important;
}
[data-ff-el="root"].ff-623350297e7ec064e82a1d10 .fd-form-control::-moz-placeholder {
color: transparent !important;
opacity: 0 !important;
}
[data-ff-el="root"].ff-623350297e7ec064e82a1d10 .fd-form-control:-ms-input-placeholder {
color: transparent !important;
opacity: 0 !important;
}
[data-ff-el="root"].ff-623350297e7ec064e82a1d10 .fd-form-control::placeholder {
color: transparent !important;
opacity: 0 !important;
}
[data-ff-el="root"].ff-623350297e7ec064e82a1d10 .fd-form-label {
top: 0;
left: 0;
right: 0;
margin: 0;
overflow: hidden;
position: absolute;
white-space: nowrap;
text-overflow: ellipsis;
pointer-events: none;
}
[data-ff-el="root"].ff-623350297e7ec064e82a1d10 .fd-form-control:not(:-moz-placeholder-shown)+.fd-form-label {
opacity: 0;
}
[data-ff-el="root"].ff-623350297e7ec064e82a1d10 .fd-form-control:not(:-ms-input-placeholder)+.fd-form-label {
opacity: 0;
}
[data-ff-el="root"].ff-623350297e7ec064e82a1d10 .fd-form-control:not(:placeholder-shown)+.fd-form-label {
opacity: 0;
}
[data-ff-el="root"].ff-623350297e7ec064e82a1d10 .fd-form-description {
margin: 5px 0 0 0;
font-size: 0.8em;
}
[data-ff-el="root"].ff-623350297e7ec064e82a1d10 .fd-form-feedback {
margin: 5px 0 0 0;
font-size: 0.8em;
}
[data-ff-el="root"].ff-623350297e7ec064e82a1d10 .fd-form-group {
margin: 0 0 15px;
position: relative;
}
[data-ff-el="root"].ff-623350297e7ec064e82a1d10 .fd-form-group.fd-has-success .fd-form-feedback,
[data-ff-el="root"].ff-623350297e7ec064e82a1d10 .fd-form-group.fd-has-success .fd-form-check {
color: #02dba8 !important;
}
[data-ff-el="root"].ff-623350297e7ec064e82a1d10 .fd-form-group.fd-has-success .fd-form-control {
color: #02dba8 !important;
border-color: #02dba8 !important;
}
[data-ff-el="root"].ff-623350297e7ec064e82a1d10 .fd-form-group.fd-has-success .fd-form-feedback {
display: block;
}
[data-ff-el="root"].ff-623350297e7ec064e82a1d10 .fd-form-group.fd-has-error .fd-form-feedback,
[data-ff-el="root"].ff-623350297e7ec064e82a1d10 .fd-form-group.fd-has-error .fd-form-check {
color: #eb3d3b !important;
}
[data-ff-el="root"].ff-623350297e7ec064e82a1d10 .fd-form-group.fd-has-error .fd-form-control {
color: #eb3d3b !important;
border-color: #eb3d3b !important;
}
[data-ff-el="root"].ff-623350297e7ec064e82a1d10 .fd-form-group.fd-has-error .fd-form-feedback {
display: block;
}
[data-ff-el="root"].ff-623350297e7ec064e82a1d10 .fd-btn {
cursor: pointer;
display: -webkit-inline-box;
display: inline-flex;
outline: none;
max-width: 100%;
font-style: normal;
text-align: center;
-webkit-box-align: center;
align-items: center;
text-shadow: none;
white-space: normal;
-webkit-box-pack: center;
justify-content: center;
text-decoration: none;
}
[data-ff-el="root"].ff-623350297e7ec064e82a1d10 .fd-btn:hover {
outline: none;
}
[data-ff-el="root"].ff-623350297e7ec064e82a1d10 .fd-btn:focus {
outline: none;
}
[data-ff-el="root"].ff-623350297e7ec064e82a1d10 .fd-btn:disabled {
opacity: 0.8;
}
[data-ff-el="root"].ff-623350297e7ec064e82a1d10 .fd-form-check {
cursor: pointer;
margin: 0;
display: -webkit-box;
display: flex;
position: relative;
-webkit-box-align: center;
align-items: center;
padding-left: 30px;
}
[data-ff-el="root"].ff-623350297e7ec064e82a1d10 .fd-form-check__input {
top: 0;
left: 0;
width: 18px;
height: 18px;
opacity: 0;
z-index: -1;
position: absolute;
}
[data-ff-el="root"].ff-623350297e7ec064e82a1d10 .fd-form-check__checkmark {
top: 0;
left: 0;
width: 18px;
border: 1px solid #c4c4c4;
height: 18px;
display: block;
position: absolute;
background: #ffffff;
}
[data-ff-el="root"].ff-623350297e7ec064e82a1d10 .fd-form-check__label {
margin: 0;
font-size: 14px;
text-align: left;
word-break: break-word;
font-weight: 400;
line-height: 18px;
letter-spacing: 0.01em;
}
[data-ff-el="root"].ff-623350297e7ec064e82a1d10 .fd-form-check__input:checked+.fd-form-check__checkmark::after {
opacity: 1;
z-index: 1;
visibility: visible;
}
[data-ff-el="root"].ff-623350297e7ec064e82a1d10 .fd-form-check__checkmark::after {
top: -1px;
left: -1px;
width: 18px;
height: 18px;
content: "";
display: block;
opacity: 0;
z-index: -1;
position: absolute;
-webkit-transition: opacity 0.4s, z-index 0.4s;
transition: opacity 0.4s, z-index 0.4s;
visibility: inherit;
background-size: 12px;
background-image: url("data:image/svg+xml,%3csvg xmlns='http://www.w3.org/2000/svg' fill='black' width='12' height='10' viewBox='0 0 11.51 8.2'%3e%3ctitle%3echeck%3c/title%3e%3cpath d='M4.05%2c8.2A.74.74%2c0%2c0%2c1%2c3.52%2c8L.22%2c4.68A.75.75%2c0%2c0%2c1%2c1.28%2c3.62l3.3%2c3.3A.75.75%2c0%2c0%2c1%2c4.58%2c8%2c.74.74%2c0%2c0%2c1%2c4.05%2c8.2Z'/%3e%3cpath d='M4.06%2c8.2A.74.74%2c0%2c0%2c1%2c3.53%2c8a.75.75%2c0%2c0%2c1%2c0-1.06l6.7-6.7a.75.75%2c0%2c0%2c1%2c1.06%2c1.06L4.59%2c8A.74.74%2c0%2c0%2c1%2c4.06%2c8.2Z'/%3e%3c/svg%3e");
background-repeat: no-repeat;
background-position: center center;
}
[data-ff-el="root"].ff-623350297e7ec064e82a1d10 .fd-form-check__input:focus {
outline: none;
}
[data-ff-el="root"].ff-623350297e7ec064e82a1d10 .fd-form-content {
position: relative;
}
[data-ff-el="root"].ff-623350297e7ec064e82a1d10 .fd-has-success .fd-form-content {
display: none;
}
[data-ff-el="root"].ff-623350297e7ec064e82a1d10 .fd-has-captcha .fd-form-content>*:not(.fd-form-captcha) {
opacity: 0;
visibility: hidden;
}
[data-ff-el="root"].ff-623350297e7ec064e82a1d10 .fd-form-captcha {
top: 0;
left: 0;
width: 100%;
height: 100%;
display: -webkit-box;
display: flex;
position: absolute;
-webkit-box-align: center;
align-items: center;
-webkit-box-pack: start;
justify-content: flex-start;
}
[data-ff-el="root"].ff-623350297e7ec064e82a1d10 .fd-form-success {
display: none;
}
[data-ff-el="root"].ff-623350297e7ec064e82a1d10 .fd-has-success .fd-form-success {
display: block;
}
[data-ff-el="root"].ff-623350297e7ec064e82a1d10 .fd-form-success>*:last-child {
margin-bottom: 0;
}
[data-ff-el="root"].ff-623350297e7ec064e82a1d10 .fd-form-error {
display: none;
}
[data-ff-el="root"].ff-623350297e7ec064e82a1d10 .fd-has-error .fd-form-error {
display: block;
}
[data-ff-el="root"].ff-623350297e7ec064e82a1d10 .fd-form-error>*:last-child {
margin-bottom: 0;
}
[data-ff-el="root"].ff-623350297e7ec064e82a1d10 .fd-focus-visible,
[data-ff-el="root"].ff-623350297e7ec064e82a1d10 .fd-form-check__input.fd-focus-visible+.fd-form-check__checkmark {
outline: none;
box-shadow: 0 0 0 2px #fff, 0 0 0 6px #000 !important;
-webkit-transition: box-shadow 0.2s !important;
transition: box-shadow 0.2s !important;
}
[data-ff-el="root"].ff-623350297e7ec064e82a1d10 .fd-focus-visible,
[data-ff-el="root"].ff-623350297e7ec064e82a1d10 .fd-form-check__input.fd-focus-visible+.fd-form-check__checkmark {
outline: none;
box-shadow: 0 0 0 2px #ffffff, 0 0 0 6px #000 !important;
-webkit-transition: box-shadow 0.2s !important;
transition: box-shadow 0.2s !important;
}
[data-ff-el="root"].ff-623350297e7ec064e82a1d10 {
background: transparent;
}
[data-ff-el="root"].ff-623350297e7ec064e82a1d10 .ff-623350297e7ec064e82a1d10__container {
margin: 0 auto;
max-width: 1170px;
background: transparent;
}
[data-ff-el="root"].ff-623350297e7ec064e82a1d10 .ff-623350297e7ec064e82a1d10__form {
color: #333333;
width: 100%;
margin: 0;
font-size: 16px;
text-align: center;
font-family: Helvetica, sans-serif;
font-weight: 300;
line-height: 1.6;
letter-spacing: 0.1px;
text-transform: none;
}
@media (max-width: 767px) {
[data-ff-el="root"].ff-623350297e7ec064e82a1d10 .ff-623350297e7ec064e82a1d10__form {
word-wrap: anywhere;
word-break: break-word;
white-space: normal;
overflow-wrap: break-word;
}
}
[data-ff-el="root"].ff-623350297e7ec064e82a1d10 .ff-623350297e7ec064e82a1d10__title * {
line-height: inherit;
}
[data-ff-el="root"].ff-623350297e7ec064e82a1d10 .ff-623350297e7ec064e82a1d10__subtitle {
width: 100%;
margin: 0 0 30px;
display: block;
}
[data-ff-el="root"].ff-623350297e7ec064e82a1d10 .ff-623350297e7ec064e82a1d10__subtitle * {
line-height: inherit;
}
[data-ff-el="root"].ff-623350297e7ec064e82a1d10 .ff-623350297e7ec064e82a1d10__content {
margin: -10px -5px 0;
display: -webkit-box;
display: flex;
flex-wrap: wrap;
-webkit-box-align: start;
align-items: start;
-webkit-box-orient: horizontal;
-webkit-box-direction: normal;
flex-direction: row;
-webkit-box-pack: center;
justify-content: center;
}
@media (max-width: 767px) {
[data-ff-el="root"].ff-623350297e7ec064e82a1d10 .ff-623350297e7ec064e82a1d10__content {
display: block;
}
}
[data-ff-el="root"].ff-623350297e7ec064e82a1d10 .ff-623350297e7ec064e82a1d10__fields {
-webkit-box-flex: 0;
flex: 0 1 auto;
margin: 0px 0px 0;
display: -webkit-box;
display: flex;
flex-wrap: wrap;
max-width: -webkit-calc(100% + 10px);
max-width: calc(100% + 10px);
-webkit-box-pack: center;
justify-content: center;
}
@media (max-width: 767px) {
[data-ff-el="root"].ff-623350297e7ec064e82a1d10 .ff-623350297e7ec064e82a1d10__fields {
display: block;
}
}
[data-ff-el="root"].ff-623350297e7ec064e82a1d10 .ff-623350297e7ec064e82a1d10__field {
-webkit-box-flex: 1;
flex: 1 1;
margin: 10px 5px 0;
font-size: 13px;
max-width: 400px;
min-width: 200px;
text-align: left;
font-family: Helvetica, sans-serif;
font-weight: 400;
letter-spacing: 0.1px;
}
@media (max-width: 767px) {
[data-ff-el="root"].ff-623350297e7ec064e82a1d10 .ff-623350297e7ec064e82a1d10__field {
max-width: -webkit-calc(100% - 10px);
max-width: calc(100% - 10px);
}
}
[data-ff-el="root"].ff-623350297e7ec064e82a1d10 .ff-623350297e7ec064e82a1d10__control {
color: #000000;
border: 1px solid #dddddd;
height: 46px;
padding: 12px 20px;
font-size: 13px;
background: #ffffff;
text-align: left;
font-family: Helvetica, sans-serif;
font-weight: 400;
line-height: 20px;
border-radius: 0px;
letter-spacing: 0.1px;
text-transform: none;
}
[data-ff-el="root"].ff-623350297e7ec064e82a1d10 .ff-623350297e7ec064e82a1d10__label {
color: #000000;
border: 1px solid transparent;
padding: 12px 20px;
font-size: 13px;
text-align: left;
font-family: Helvetica, sans-serif;
font-weight: 400;
line-height: 20px;
letter-spacing: 0.1px;
text-transform: none;
}
[data-ff-el="root"].ff-623350297e7ec064e82a1d10 .ff-623350297e7ec064e82a1d10__preference {
margin: 30px 5px 0;
display: -webkit-box;
display: flex;
-webkit-box-orient: vertical;
-webkit-box-direction: normal;
flex-direction: column;
}
[data-ff-el="root"].ff-623350297e7ec064e82a1d10 .ff-623350297e7ec064e82a1d10__preference-title {
color: #333333;
width: 100%;
margin: 0 0 30px;
display: block;
font-size: 18px;
text-align: center;
font-family: Helvetica, sans-serif;
font-weight: 700;
line-height: 1.4;
letter-spacing: 0px;
text-transform: none;
}
[data-ff-el="root"].ff-623350297e7ec064e82a1d10 .ff-623350297e7ec064e82a1d10__preference-title * {
line-height: inherit;
}
[data-ff-el="root"].ff-623350297e7ec064e82a1d10 .ff-623350297e7ec064e82a1d10__preference-control {
width: 100%;
}
[data-ff-el="root"].ff-623350297e7ec064e82a1d10 .ff-623350297e7ec064e82a1d10__preference-list {
width: -webkit-calc(100% + 24px);
width: calc(100% + 24px);
margin: -8px -12px;
display: -webkit-box;
display: flex;
flex-wrap: wrap;
-webkit-box-pack: start;
justify-content: flex-start;
}
@media (max-width: 767px) {
[data-ff-el="root"].ff-623350297e7ec064e82a1d10 .ff-623350297e7ec064e82a1d10__preference-list {
display: block;
}
}
[data-ff-el="root"].ff-623350297e7ec064e82a1d10 .ff-623350297e7ec064e82a1d10__preference-item {
-webkit-box-flex: 0;
flex: 0 0 33.333333333333336%;
padding: 8px 12px;
}
[data-ff-el="root"].ff-623350297e7ec064e82a1d10 .ff-623350297e7ec064e82a1d10__form-check .fd-form-check__input {
top: 2.200000000000001px;
}
[data-ff-el="root"].ff-623350297e7ec064e82a1d10 .ff-623350297e7ec064e82a1d10__form-check .fd-form-check__checkmark {
top: 2.200000000000001px;
border-radius: 3px;
}
[data-ff-el="root"].ff-623350297e7ec064e82a1d10 .ff-623350297e7ec064e82a1d10__form-check .fd-form-check__label {
color: #333333;
font-size: 14px;
min-height: 22.400000000000002px;
font-family: Helvetica, sans-serif;
font-weight: 400;
line-height: 1.6;
letter-spacing: 0px;
text-transform: none;
}
[data-ff-el="root"].ff-623350297e7ec064e82a1d10 .ff-623350297e7ec064e82a1d10__form-check .fd-form-check__checkmark::after {
background-size: 12px;
background-image: url("data:image/svg+xml,%3csvg xmlns='http://www.w3.org/2000/svg' fill='black' width='12' height='10' viewBox='0 0 11.51 8.2'%3e%3ctitle%3echeck%3c/title%3e%3cpath d='M4.05%2c8.2A.74.74%2c0%2c0%2c1%2c3.52%2c8L.22%2c4.68A.75.75%2c0%2c0%2c1%2c1.28%2c3.62l3.3%2c3.3A.75.75%2c0%2c0%2c1%2c4.58%2c8%2c.74.74%2c0%2c0%2c1%2c4.05%2c8.2Z'/%3e%3cpath d='M4.06%2c8.2A.74.74%2c0%2c0%2c1%2c3.53%2c8a.75.75%2c0%2c0%2c1%2c0-1.06l6.7-6.7a.75.75%2c0%2c0%2c1%2c1.06%2c1.06L4.59%2c8A.74.74%2c0%2c0%2c1%2c4.06%2c8.2Z'/%3e%3c/svg%3e");
}
[data-ff-el="root"].ff-623350297e7ec064e82a1d10 .ff-623350297e7ec064e82a1d10__footer {
-webkit-box-flex: 0;
flex: 1;
margin-top: 10px;
text-align: center;
margin-left: 5px;
margin-right: 5px;
}
@media (max-width: 767px) {
[data-ff-el="root"].ff-623350297e7ec064e82a1d10 .ff-623350297e7ec064e82a1d10__footer {
margin-top: 25px;
}
}
[data-ff-el="root"].ff-623350297e7ec064e82a1d10 .ff-623350297e7ec064e82a1d10__button {
color: #000000;
border: 1px solid #ffd253;
display: inline-block;
padding: 12px 20px;
font-size: 13px;
background: #ffd253;
text-align: center;
font-family: Helvetica, sans-serif;
font-weight: 700;
line-height: 20px;
white-space: nowrap;
border-radius: 0px;
letter-spacing: 0.8px;
text-transform: uppercase;
width: 100%;
display: block;
}
[data-ff-el="root"].ff-623350297e7ec064e82a1d10 .ff-623350297e7ec064e82a1d10__error {
margin: 10px 0 0 0;
}
(function(w, d, t, h, s, n) {
w.FlodeskObject = n;
var fn = function() {
(w[n].q = w[n].q || []).push(arguments);
};
w[n] = w[n] || fn;
var f = d.getElementsByTagName(t)[0];
var v = '?v=' + Math.floor(new Date().getTime() / (120 * 1000)) * 60;
var sm = d.createElement(t);
sm.async = true;
sm.type = 'module';
sm.src = h + s + '.mjs' + v;
f.parentNode.insertBefore(sm, f);
var sn = d.createElement(t);
sn.async = true;
sn.noModule = true;
sn.src = h + s + '.js' + v;
f.parentNode.insertBefore(sn, f);
})(window, document, 'script', 'https://assets.flodesk.com', '/universal', 'fd');
window.fd('form:handle', {
formId: '623350297e7ec064e82a1d10',
rootEl: '.ff-623350297e7ec064e82a1d10',
});
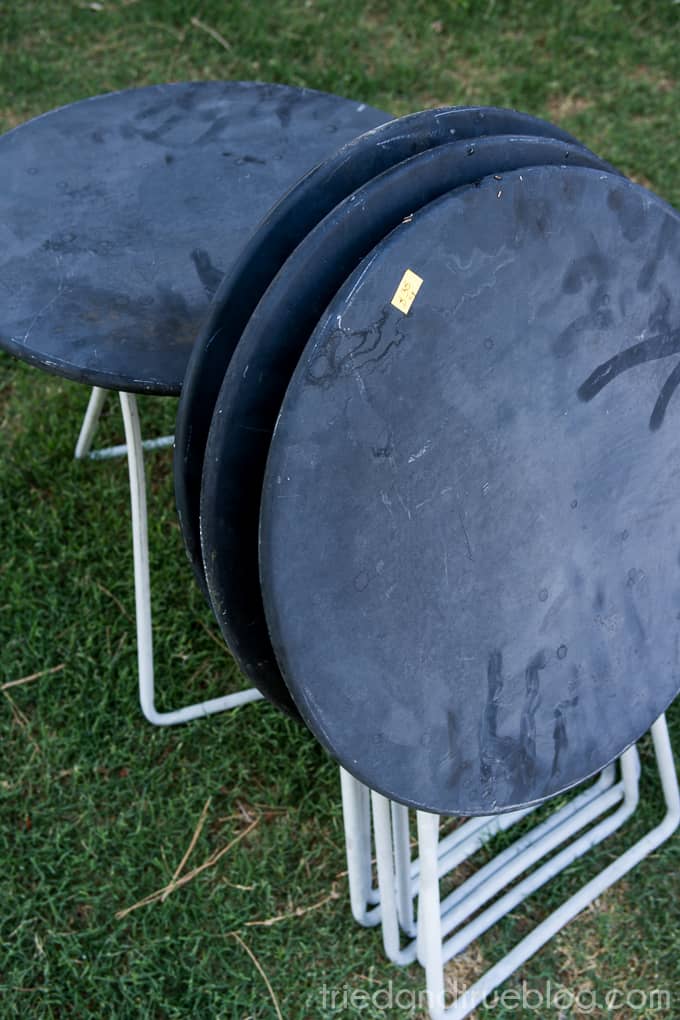
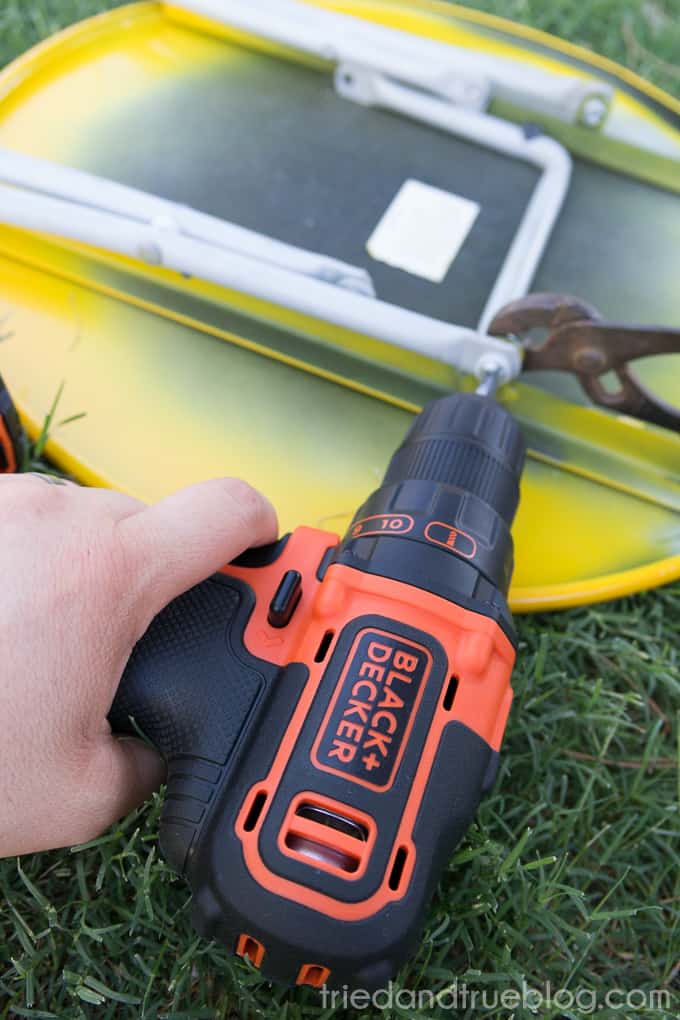
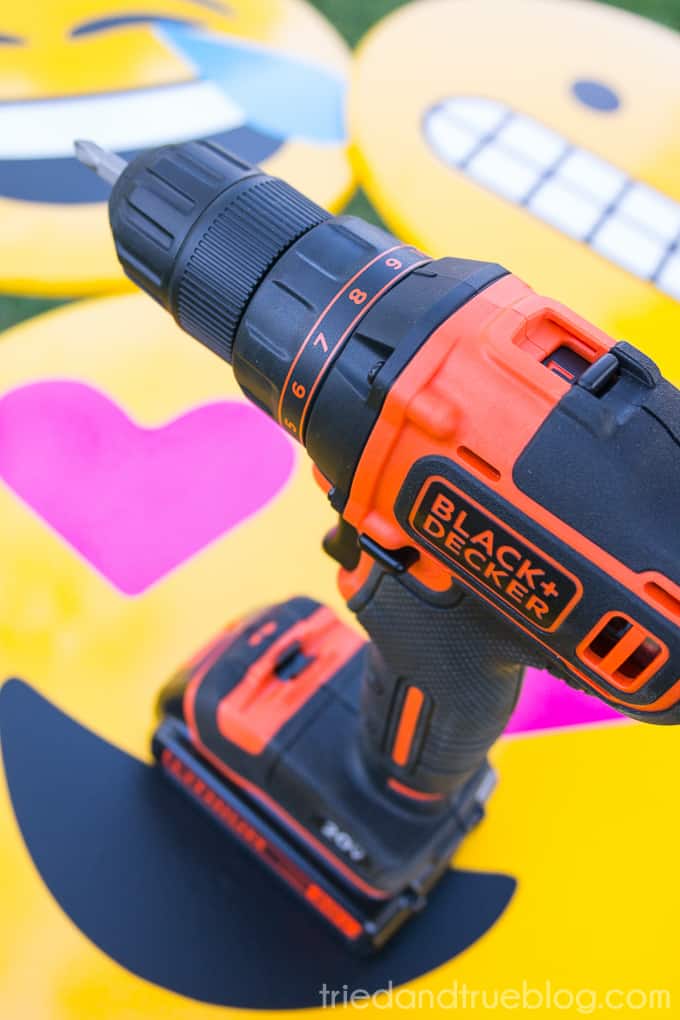
 But First Supplies
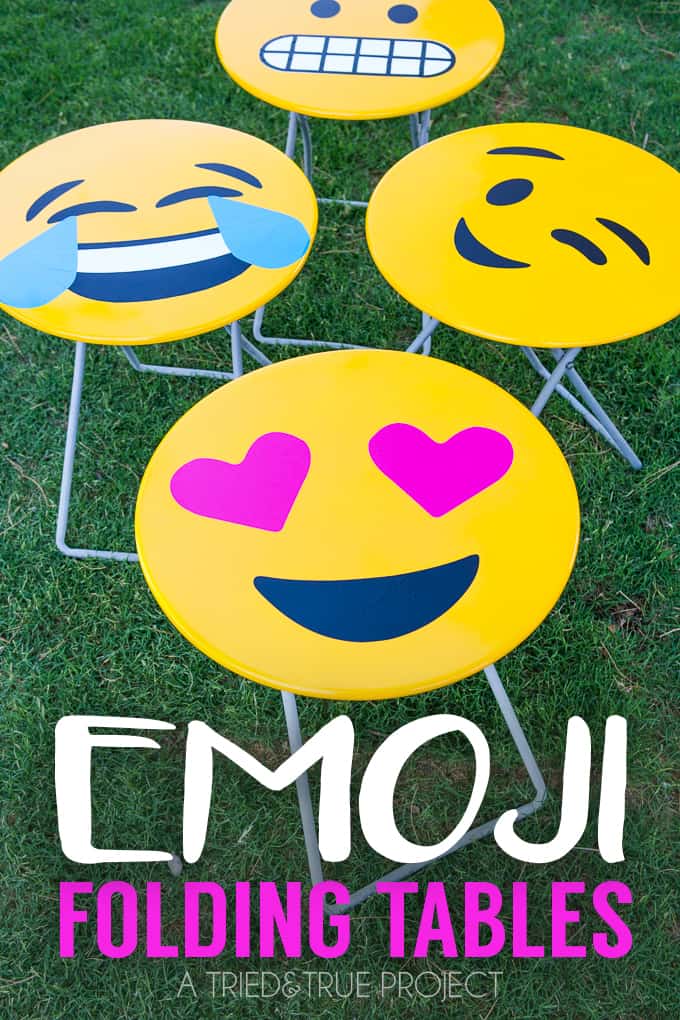
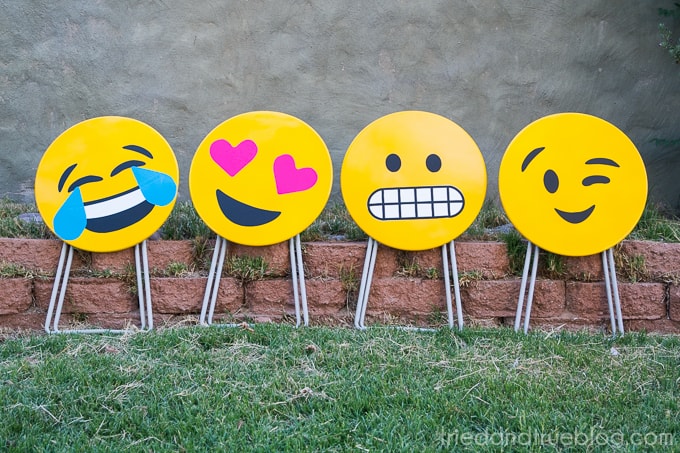
 So Many Emotions


Comments & Reviews
Deborah West says
Two features on the Black and Decker 20 volt Max Lithium drill is that it has an LED light and it is light weight. Those are two favorite features I like in a product. This week I am assembling some new bird and bat houses. Cordless drills make this project easy and enjoyable to do. Thank you for your adorable emoji table how to article and for this giveaway! Keep cool!
Sherr Fram says
I would make a table & chairs for my patio!
Christa McCann says
I would love to win this drill- FURST project would be a bench for the backyard!
David says
I don’t think I could pull of the designs on your tables, but I like the idea of making TV trays similar to what you have. We usually eat at the kitchen table, but for those times when we eat from the couch, TV trays would be a great thing to have. I could even make the legs wooden, as opposed to the ones on your tables.
Elena says
I would make a bird feeder
allyson tice says
i visited the site and if i won i would attempt to make a round picnic table!
MaryAnn says
I would make a bookshelf for the kids
Lisa Brown says
I would build a simple wood toy box for the kids play things. Thanks for the chance to win 🙂
jslbrown2009 at aol dot com
kelly tupick says
I would make a new wooden dog bed for my rat terrier. I want one with the bed on top, stairs on the side and her food bowls on the bottom.
Audrey Stewart (@AudreyS23511436) says
I bought these old chairs at a yard sale, and I have to cut the wood to fit the seat. Then I’ll cover them.
Julie Wood says
I would make a tired Flower Plant Stand if I won and a picnic table for my back yard! Thanks for an awesome prize giveaway!
Raki says
I will use it for fixing up floor and cracks in dry wall. thanks
monique s. says
I would make a table and chairs for the kids to play on in the backyard
Kathy Clark says
My husband really wants to make us a fancy hardwood kitchen table! He’s already picked out the stain!
elizabeth miller says
These would be fabulous because my 10 year old daughter is looking at your emoji tables going nuts. I can tell you if we were to win, she and I would be using them to make these for her and some of her friends. They are all emoji crazy. I would also use the drill for some fix up projects I have around the house this year as well.
Christina Sparks says
I like the idea of the crown molding shelf.
Kelly Maxwell says
So many great ideas!! I think my favorite idea is the DIY Laundry organizer. I would love to build this. Thanks for the inspiration!
Ken Haggerty says
I would rebuild the wife’s antique patio bench.
sandra says
I might make the diy storage towers
Laura @ Make Life LovelyLaura says
Your tables are ADORABLE Vanessa!! SO creative!!
Christina Peters says
I could really use a Black + Decker Screw gun so I could build some much needed shelves in my Bathroom. I never knew their website had such a large variety of DIY Ideas and Inspirations but I will be going there more often to get designs and tips.
Allison M says
i’d love to make that chalkboard menu board!
Amy Orvin says
I would make a few lawn chairs for the front porch.
harmony burmeister says
Love that its compact. Would be great for repairs around the house
Evie B. says
I would love to add shelves to my laundry/storage room.
DJ says
I would use on our new deck we are building this summer.
Janet O says
I would build a lean-to for our property
Eg Kaufman says
I would make some fun shelves for my kids.
clynsg says
This would be for my son-in-law, who plans to make picnic tables .
SHIRLEY SYMON says
I am looking for a miter saw or jigsaw to make my own frames for my cross stitch projects
Candice says
I would love to make the DIY Address Marker Plant Box. So cute!
Linda Szymoniak says
I’m very involved in animal rescue. We have a small feral cat colony in our neighborhood and I’m wanting to make some shelters for the cats (especially for during bad weather). I have three dogs and two cats of my own – all rescues – and am wanting to build some things for them, too. I’d love to make some agility items for the dogs and make my own cat tree for my cats.
Julie matek says
I would turn my daughter’s old crib into a desk;) thanks for the chance!
Polly Hall says
I would make an Adirondack Chair to go with the one my son made.
Emily Endrizzi says
I would want to build a large table for our on our balcony. I made one recently, but didn’t have the right tools so it isn’t very sturdy. I would redo it using the proper tools.
amy pugmire says
I would love to make a desk!
Meegan says
I have been wanting to make a bench for our balcony. This cordless drill is exactly want I need. Thanks so much.
Cassie Korando says
I would make a convertible bench/picnic table!
Megan Zuchowski says
I would try (hehe) to make a memorial bench for the backyard.
Jim Yee says
I’d make me a set of the emoji chairs, those are very cool!
Jay Jackson says
I would make a 2 tier Strawberry planter.
Michael K. says
I will surely use these drills to build a gazebo and repair the fence around the house,also build a storage shelves for the basement.
Erin M says
I’d make the Address marker plant box.
Amy Anderson says
These are AWESOME! I love them! Great job!
michelleelizondo says
I would make a wall hanging art for the living room
Heather says
I would fix our outdoor bench so I can sit outside comfortably.
Shari says
I would make a bookcase and a makeup vanity.
Laura says
I would make a new bookshelf. I’ve been needing another one for a long time. Mine is too small now to hold all of my books! 🙂
Holly Thomas says
I would make some shelves for my dining room
Khaliah says
First, your blog is awesome! Thanks for sharing this creative DIY. When I win the B&D drill I definitely have to come of with tables to make the Emoji tables! In addition to that I just recently purchased a window from a vintage market that I will repurpose to create a dream board! Since I need to attached fixtures to the frame of the window and mount it to the wall this drill would truly get the job done.
Jenna says
Shut the front door!! These are too much fun!
Jennifer Rote says
Your tables are so cute!!! I would use this to make a small tool shed.
Loralynn Maresh says
I would make myself a crafting desk for my art work
Angela Williams says
I also love the 40V MAX* Lithium 20 in. Mower for our big backyard!
upstatemissy says
I have a bunch of pallets and want to make a garbage can holder with them. If I won this would really help get that done.
peg5 says
Your emoji tables are adorable, don’t think I could pull that off, either. But I would like to make a DVD bookcase for my son’s never-ending collection of DVD’s.
Lauryn R says
These emoji tables are adorable! 🙂 I would definitely make my kids a sandbox!
Shane Russell says
If I won, I’d make a planter box for my dad’s garden.
Michael Beeton says
I would make a desk for my daughter
Christy Rivers says
i would start make shelves to hang on my walls to keep my girls from getting into anything that could harm them.
Austin Baroudi says
I would make a skate kicker ramp if I won! Thanks so much for chance!
Deborah Caudill says
If I won, I would make some built in shelves for my living room. If i am able to make those, I would make so many things. Thanks for having such a fabulous giveaway!
Erin K. says
I want to be creative and handy so badly! If I won, I would definitely like to TRY and make the DIY Entryway Organizer. Looks like an easy first project. Maybe?
Nathan Kirsch says
I’d like to make the DIY Laundry organizer.
Melanie says
I would make a wooden toolbox for a photo prop, etc.
Sarah says
I would make an Adirondack chair.
latanya t says
I would add some shelves to our pantry
Laurajj says
Oh those are so adorable!!! What a great idea! If I won, I would first make a raised garden bed. I container garden now, but I think the vegetables would love more room to grow. I do not have the tools to make one, but if I won…that is the first thing I would do!
June Lisle says
I would build wall shelves to get more things out of my toddler’s reach.
Tisa Jackson says
Vanessa! These are amazing! I’ve always waned a 20V MAX* Circular Saw! I would be able to cut all my wood pieces instead of having the guys at the hardware store do it. The first thing I would make…a wooden sign out of 2×4’s and then frames! Thanks for offering this amazing giveaway!
Lindsey L says
I would make 2 end tables with a dog crate made into it!
Abby Davis says
I’d make so many things! I’d love to have my own power drill, so I don’t have to hand drill & screw together projects.
ellen casper says
This would be great to build planter boxes for our patio.
Debra Guillen says
I loved the idea on the Black & Decker site to clear up cabinet space by displaying your most frequently used spices in convenient racks on your kitchen wall. I am tool challenged, but my husband likes tools and I would get him to make me some racks for my spices because I love to cook and have a lot of spices.
Annmarie W. says
Those are absolutely adorable! And if I won, my hubby has been wanting to make some steps for getting into the hot tub more easily…so we’d start with those!
patricia delgado says
I would make a new bed frame for our bed.
Thomas Murphy says
I would build a new deck.
Sarah Herrera says
I would make some shelves for my craft room as well as a stand for my heat press machine.
Sarah says
I’ve fallen in love with a Pinterest idea turning two old dining room chairs into a park bench, so that is what I would do with the new drill.
Thanks!!
Liza says
What couldn’t we make?!?!??
But, this little guy would be use to rebuild the bird hotel my dad was planning on doing before he got sick and passed. He used B&D tools so in some sentimental way this rebuild would be in memory of him.
Love your posts!!!!
niki says
I would make two foot stools for my new chairs and a bench for my bed.
Rachel Hinderliter says
These are so cute!!! And it’s not the most exciting project, but I’ve been wanting to build shelves into the back of my kids’ closet for a long time now. Extra storage would be amazing!
Michelle Sayre says
Ooh loads of stuff!!!
Frances says
If I had a black and decker drill I would make tables, and other DIY furniture pieces. I always wanted to try it out. Great emoji tables by the way. So doing this but to hang on The wall.
Bernadette Segura says
I would make an organizer for my laundry room, a privacy screen for my backyard, and maybe a climbing wall for my kids!
melissa george says
I need to make a dock/platform for fishing at the pond.
Jennifer V. says
Oh, gosh. What WOULDN’T I build?! The first would probably be a window box, then some cedar planters for my front porch.
Debbie says
My husband would love these! We will be making more of our signs! Thanks for the chance!!
Kate says
This would be PERFECT when I make pallet signs!
Kathyanna says
I need to add shelves to my closet and also to my craft room. Thanks for the chance to win!
Susan B says
I would make a hanging chair from pallets.
Rebecca G says
I would like to make a kitchen table that fits in my dining room/ kitchen and a headboard for my bed.
Irene Adamson says
I want to win because these would come in super handy. I teach a craft class for ladies in their 80s and 90s at a senior living facility. I’m always looking for someone to help. With these tools, I could do the prep work myself.
Thank you!
Laura Russell says
I would make a cool barn door for our house!
Melanie says
I would make a planter box!!
Andrea LaFlamme says
I would love to make some built in storage for my dining room.
Lyn Kaufmann says
I’d use it to help finish hanging pictures in the house and then I’d make bird toys!
Kathy @ Merriment Design says
I’d make a coffee table. Could definitely use this!
Doris says
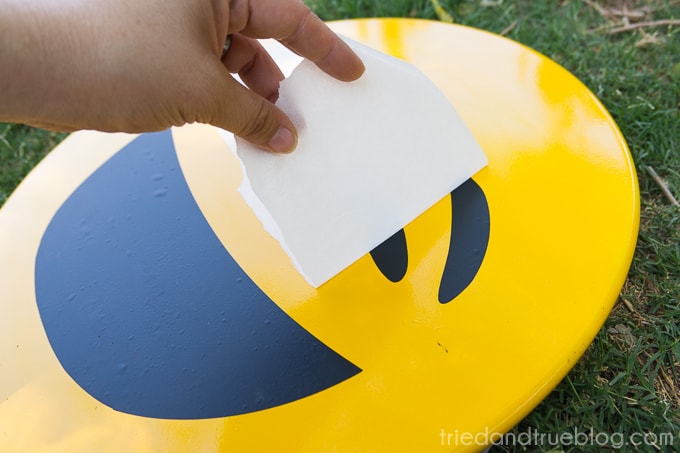
Wow – I’m impressed that you were able to cut the black vinyl teeth lines and lay them over the white teeth without a tangle of thin black vinyl lines!
Vanessa Brady says
Oh my goodness, I’m so glad someone noticed! Yes, such a huge pain. I wish I had known about this super method from The Silhouette School: http://www.silhouetteschoolblog.com/2014/05/silhouette-layering-vinyl-tutorial-no.html